


Home Makeover | Update Kitchen Cabinets for Under $100
I received nothing in exchange for this post. We were so impressed with the product we had to share!
My husband and I spent several weeks this summer looking at new homes with thoughts of upgrading our home for a newer one (while moving closer to family). It didn’t take us long to realize that what we were looking for raised our budget just past our comfort zone!
After a few weeks on the market my husband and I had a serious talk about what we wanted and what we had. In the end, we decided to stay put and invest a bit of money in our current home to update/upgrade it.

(photo is of our kitchen credit VHT Studios)
Our first project was our kitchen. Although it is not an ugly kitchen, it is a little outdated with the honey oak cabinets and floors and the chipped and cut up laminate counter tops.
After a discussion with the “kitchen man” at our local Lowes, we decided to start with our cabinets and floors before picking out the countertop.
Cabinets can be a huge expense when updating a kitchen. Ours were not in bad condition, they were just an outdated color so we decided to reface instead of replace. After researching products we found Rustoleum Cabinet Transformations.

This is a complete kit that has everything from the deglossing to the glaze.
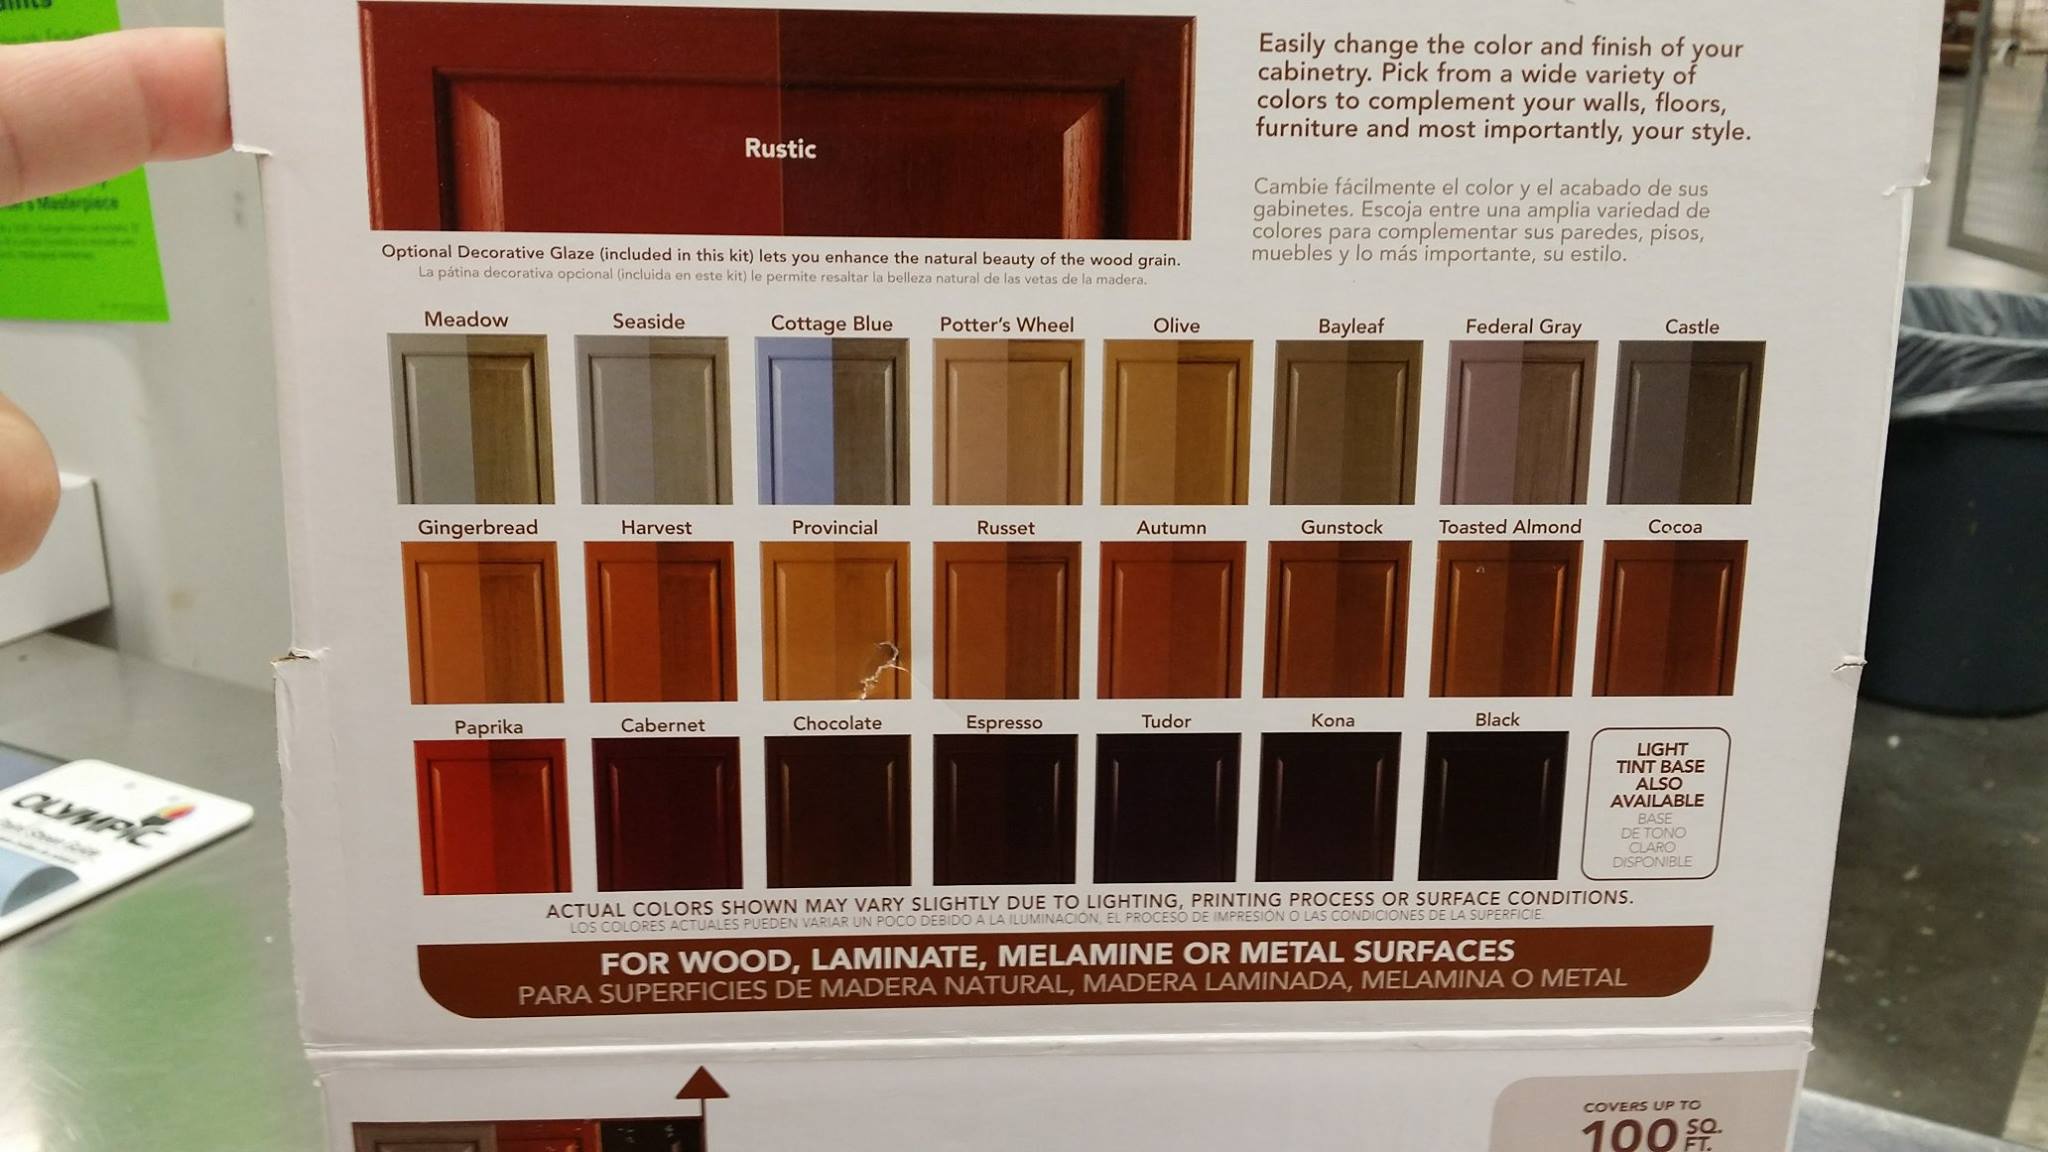
We chose the dark kit (comes in light or dark). Once you have chosen whether you are going light or dark, you then choose the final color (shown on the back of the box). Be sure to have your store tint it before you leave… they will do it for you for free. We wanted a true brown cabinet so we chose Gunstock.

The process is rather simple, but time consuming. First you remove all the doors and drawers and remove the handles and hinges.
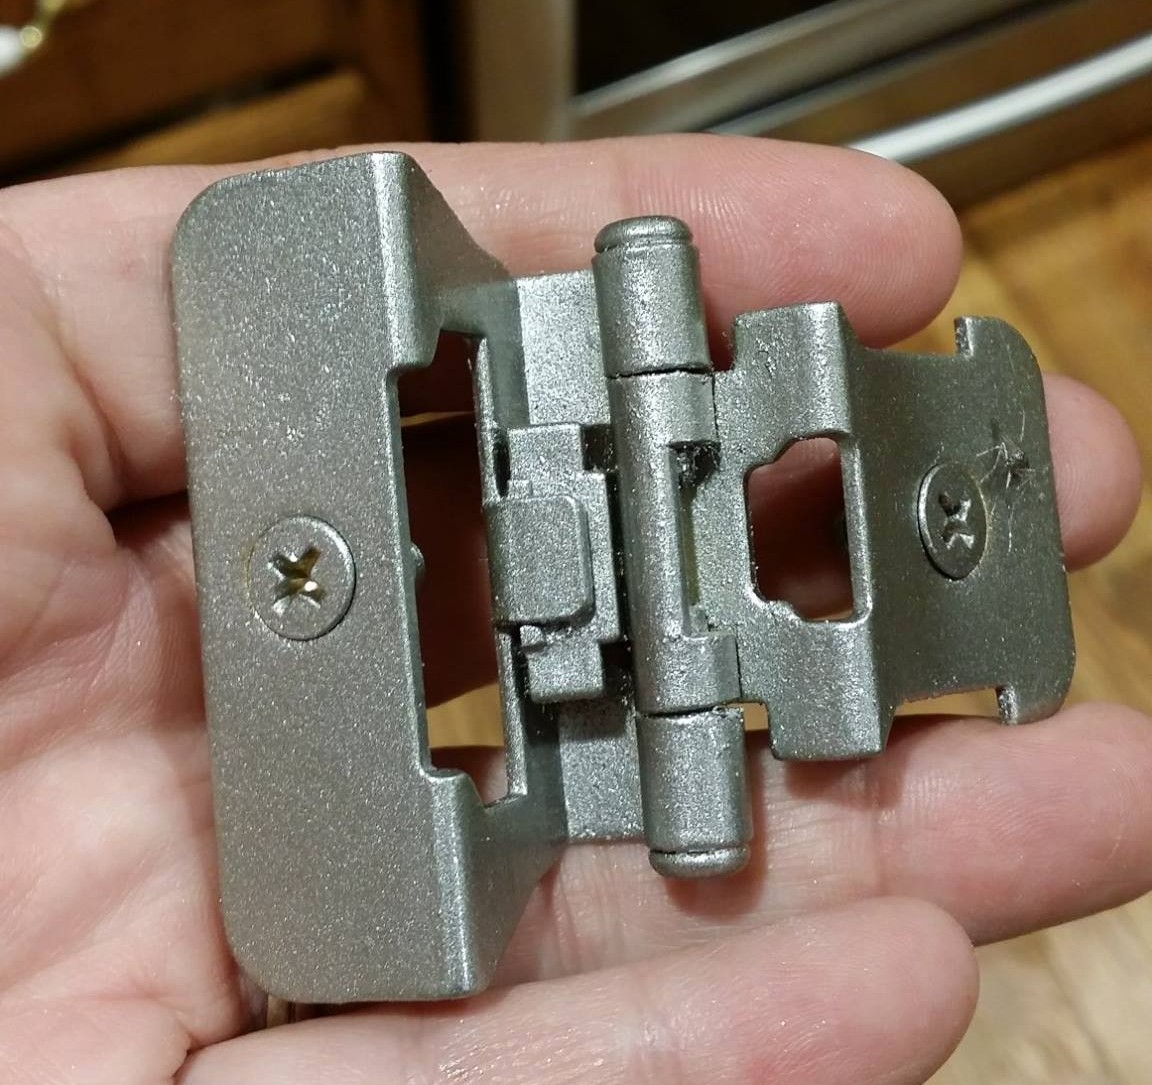
We decided to try to save a little money by spray painting our hinges. They were originally a gold-ish color, we purchased the brushed metal spray paint to cover our existing hinges.
Unfortunately our handles were too complicated with the white ceramic on the pull, so we headed to Amazon and picked out simple handles that mimicked the design on the handle on our dishwasher. We found Amazon had the best prices for the hardware and we purchased enough to do our entire kitchen and both bathrooms for $100. This will, of course, increase your cabinet budget… but it’s still a steal.

I am not going to go into huge detail on the process… if you purchase the kit it will come with a DVD with detailed directions. This is a MUST WATCH if you want a decent outcome. I will say that the first step, deglossing, is one of the most important (to help everything “stick”) but it is also the messiest and most time consuming of all of the steps. Give yourself plenty of time and do not rush through this step.
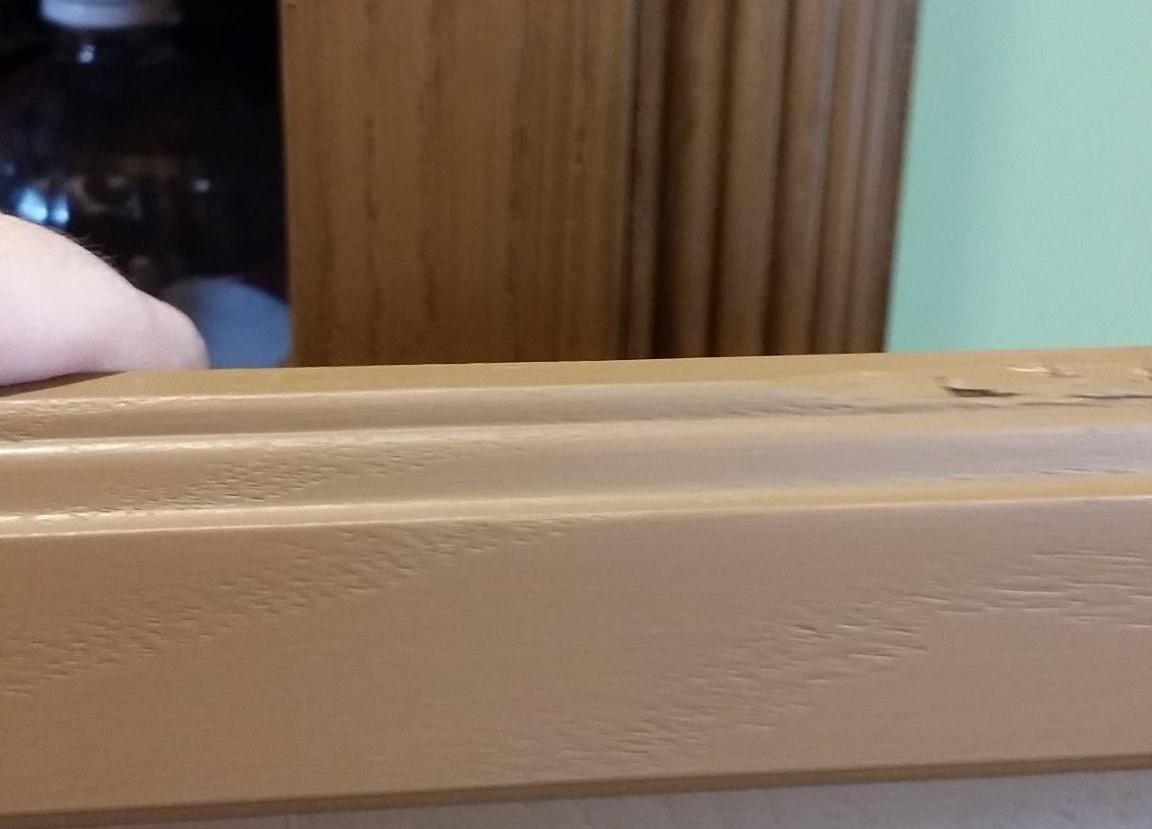
The second step paints a base coat onto your cabinet that is somewhat matte. You can choose to stay with this color, or go on to the next step which is glazing. The photo above shows the lighter colored door (just paint) and the cabinet base that has been glazed. I feel like the glazing brings out the grain in the wood and makes it look more natural.
Once you have painted and possibly glazed, your last step is to seal it with a top coat. Again, this is a very important step so be sure to watch the video. We also checked out reviews of the product for tips because we wanted the best outcome possible. We decided that my husband would apply the top coat and I would follow with a dry brush to even it out and make sure that we didn’t have any thick spots that would dry white.
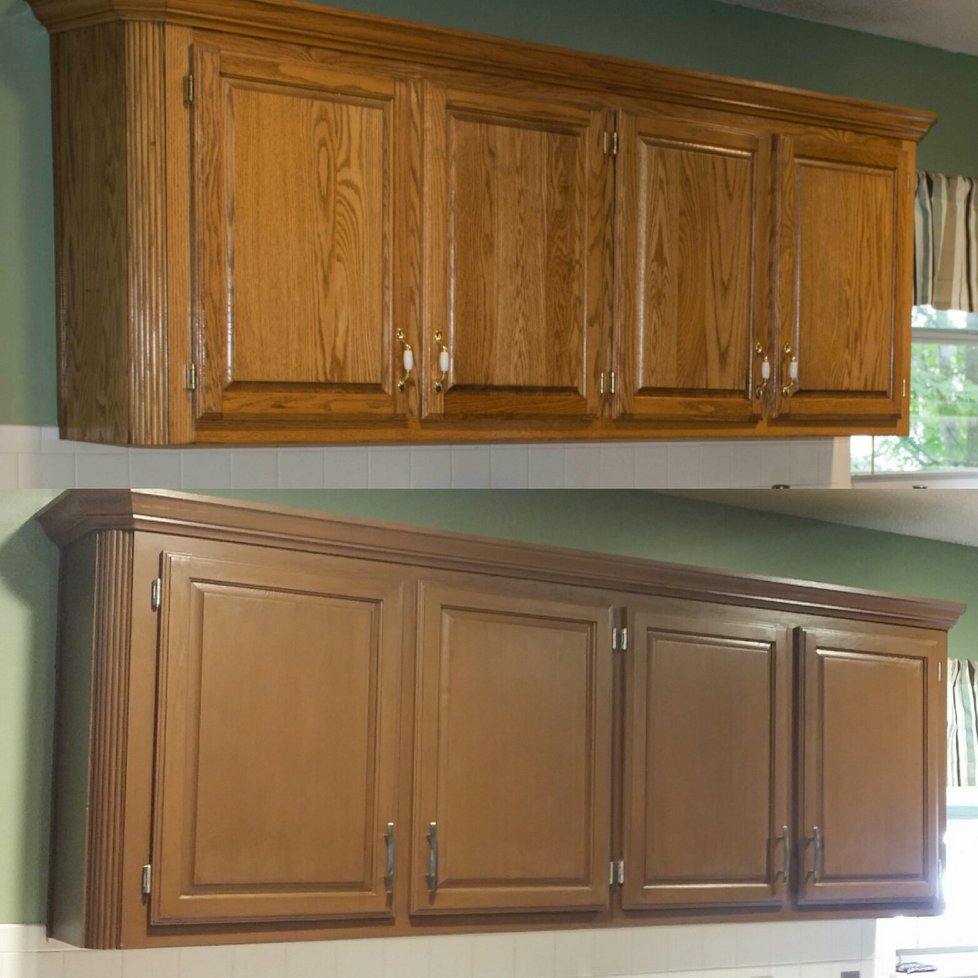
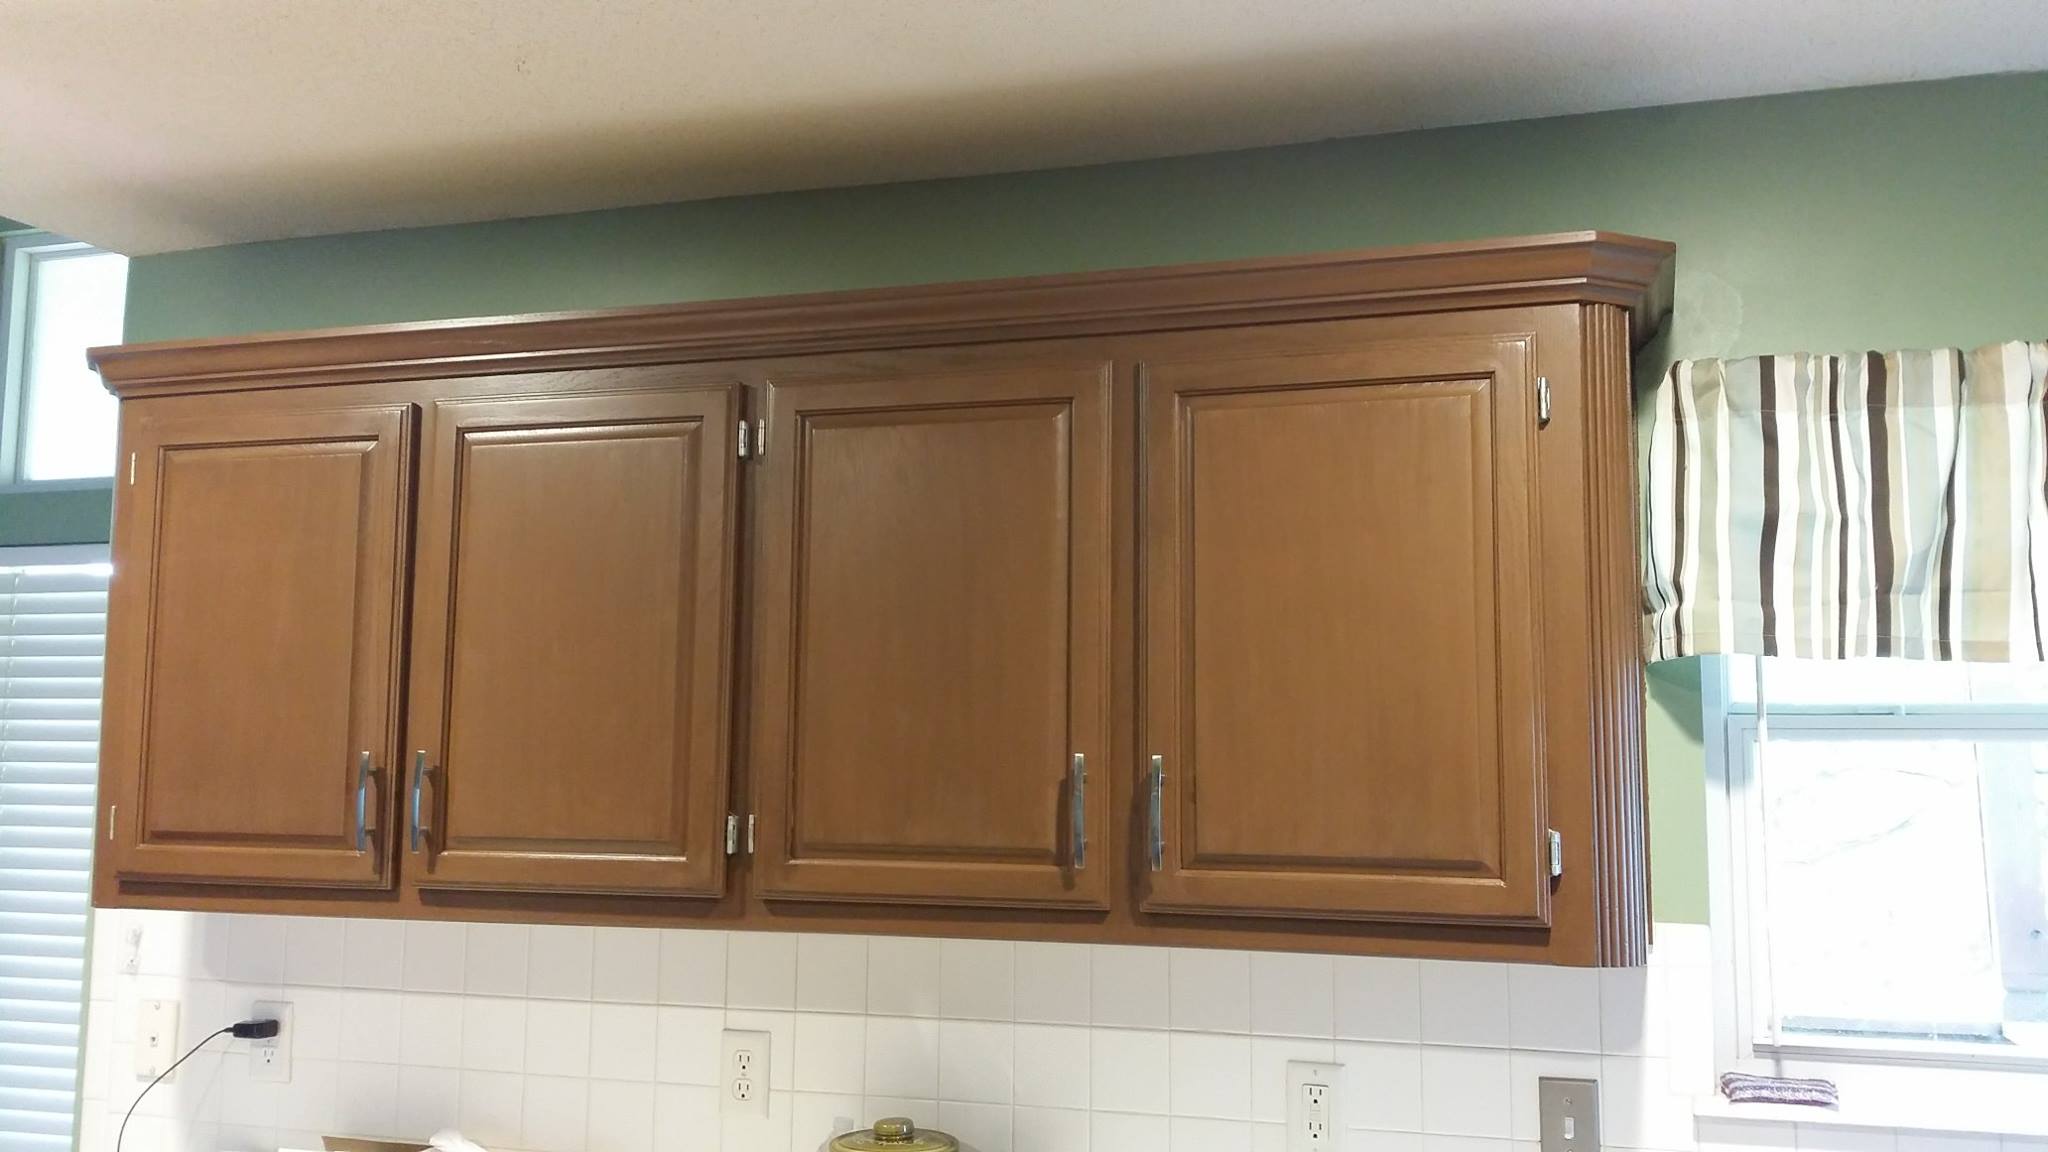
Our overall before and after shows the cabinet transformation! As much as I’d love to give you a complete before and after photo, I am going to resist as we are currently refinishing our floors. I will update with that post soon and in three short weeks I hope to have a final update with our countertop and back splash!
If you have any questions or experience tips with this product feel free to share them below!
I cannot recommend this enough… our entire kit was $80 and we had enough left over to do the bathroom as well. Add the $100 on for hardware and we updated our cabinets for $180.
While it is possible to update your kitchen cabinets for not more than $100, it is almost impossible to use the same amount for a complete kitchen makeover. So, what do you do if you want to spruce up your kitchen but do not have enough funds? Thankfully, you can take advantage of financial assistance in the form of loans. An institution like Plenti, for example, offers a Renovation Loans package that can help you transform your kitchen without breaking the bank.


Your cabinets look fantastic. I have been looking at this product for a while and I also thought about spray painting my hinges and pulls. I would love to see an update on how this held up in a few months.
This is too funny, we are going to update our cabinets and ours are the honey oak also. I’m so excited to show this to my husband. He will want to go with this kit also. I know it’s a lot of work, but if we get results like yours, it will be great!!! I will have to show you pictures once we get through, but it may a little longer since I can’t help much. I have MS and recently all I can do is call out instructions, and with one person it may take longer. I see you have wood on your kitchen floors, does it hold up well; I’ve always heard it’s bad to get water on wood floor. Of course you hear so much about every thing now days. Thanks for Sharing !!
My kitchen cupboards are in major need of updating but they are gonna have to be replaced they are so yuck! 🙁
What a great idea! I had no idea this product was even out there! I’d love to give this a try.
Good ideas! To make your kitchen more attractive by Laminate veneer over cabinet and drawer fronts or install new wood.